Recipes

Garlic Bread Sandwiches

Today, like most days, was a busy one here on the homestead. We have basketball practice right after work. So it’s run around and run around some more.

Making dinner can be a challenge on those busy days. Eating out is expensive and unhealthy. Not that this menu, I am sharing today, is super healthy. However, it’s home cooked and I know everything that is in it.

One go-to recipe is my easy bread recipe. I use it to make breadsticks, garlic bread, pepperoni bread, buns, baguettes, rolls, flat bread, pizza dough and calzones. It is that versatile.

Not only can it be used for many dishes, but also, you can make it quickly and with no special equipment. If you can make a boxed cake, you can make this recipe.

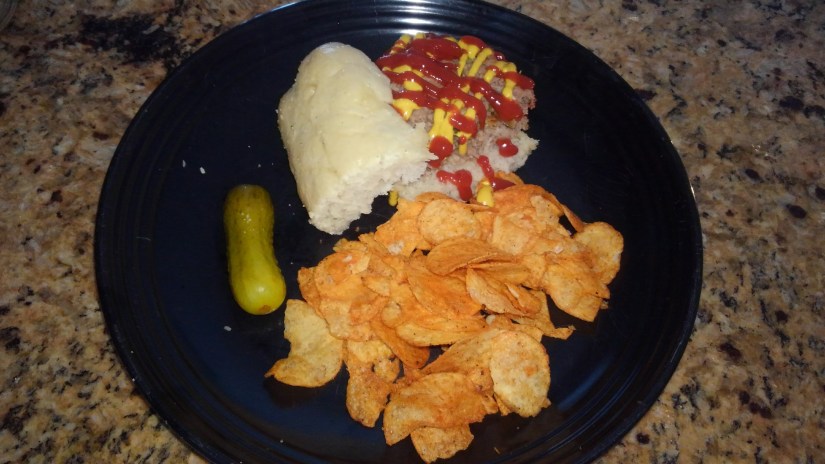
Today I used leftover meatloaf to make quick sandwiches out of my bread recipe. I am a big fan of making extra meat and freezing the leftovers to use in another meal. I try to recreate something so leftovers are not boring. I rarely buy bread at the store, by the way. Why when my homemade bread is great? I love to make sandwiches, yes, but these are special sandwiches because they are made with garlic bread. I make bread, cover it in yummy garlic olive oil, slice it down the middle and fill it with my favorite items.

Garlic Bread Meatloaf Sandwich

If you think this sandwich looks good, you should try it with Italian meats, cheeses and peppers. It makes a superb deli sandwich. Especially with the garlic seasoning on top.

There are a few things to remember with bread. You don’t want get your water too hot or you will kill your yeast. There are many rules with bread but my recipe doesn’t apply to the rules because it’s what I consider a quick bread. You are not developing a bunch of flavors like sourdough, or a chewy outside. This recipe is as basic as Chef Boyardee.

This recipe is easy to double too. It makes two small or one large loaf. Homemade bread does not have a long shelf life since it does not have all those preservatives that store bought bread has. So darn, you will need to eat it up right away. If you do have leftovers, store it in your fridge.

So lets get started.

For the dough:

1/4 cup of warm water. It should be warm but not hot.

3 tablespoons of sugar

1 packet of active dry yeast

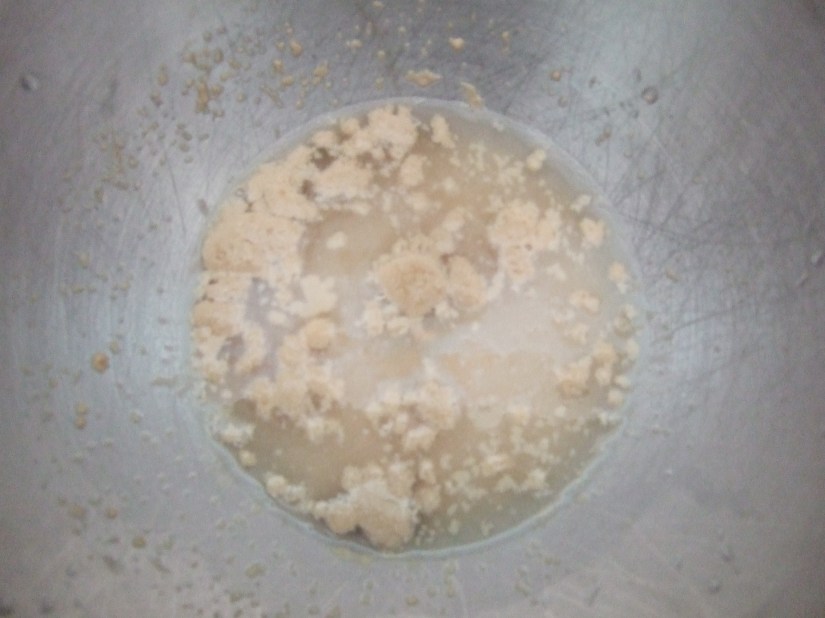
Put all three ingredients in a bowl and let set until the yeast is bubbly. You don’t want to skip this part because this is where you find out if your yeast is good. Bubbly is good. No bubbles, then your bread will not rise properly.

DSCF0718

The other ingredients:

3/4 cup of warm milk

2 1/2  to 3 cups of all purpose or bread flour

2 tablespoons of oil. I prefer olive oil

1 teaspoon of salt

Add the milk, oil and salt, to the yeast mixture. Gradually add the flour. Start with 2 cups and add the rest a little at a time. You want your dough to be sticky but not unmanageable. I use my mixer with a dough hook but it is not necessary. This dough does not have to be perfect but it’s better if you don’t have too much flour. If you do, it will make the dough more dry, versus soft and tender. Otherwise, if you don’t have a dough hook, you just mix it with a fork and use your hands to kneed it for a minute to make sure all the ingredients are mixed well. Again, you are not going for any special features. Just a good quick bread.

This video demonstrates what your dough should look like when it is done with a mixer. This is the perfect consistency. It sticks to the bottom but not the sides of the pan. When it looks like this, you are done with adding flour.


From this point there are multiple things you can do. I recommend letting the dough rest for at least 10 minutes. That way it softens up and it’s easier to work with. You can also let it double in size, like most recipes, but it’s really not necessary. The more you let it rise and break it back down, the more the yeast flavor develops. If you are in a hurry, it doesn’t need it. Also, there is a lot of sugar in this bread, which allows the bread to rise rather quickly. Yeast eats sugar and that is what helps it do it’s thing.

DSCF0721
I let it rise until doubled because I had time

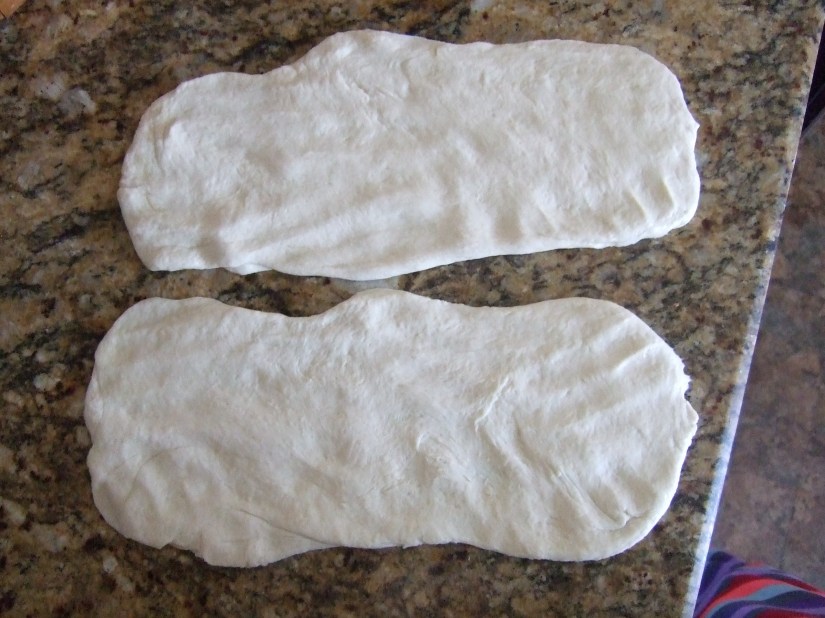
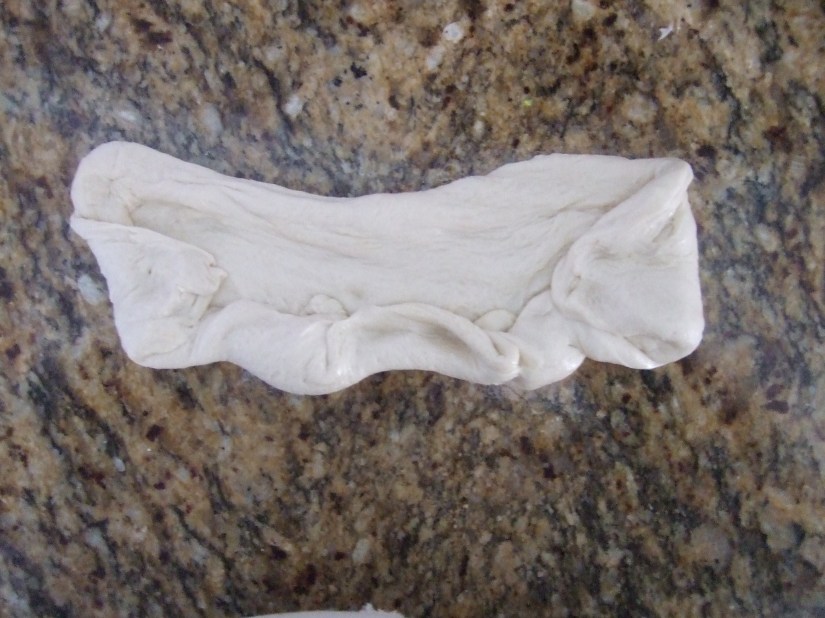
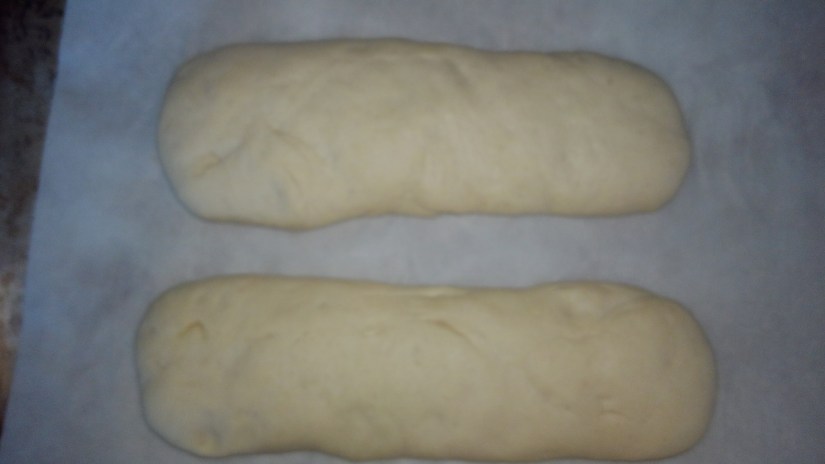
Now it is time to shape your dough. I made large squares out of mine. Almost like baguette bread but more square. I needed my meatloaf to fit perfectly on the bread.  To shape the dough in a bread, you want to flatten it and roll it jelly roll style. You tuck the ends and roll.

DSCF0722
Flatten it out first
DSCF0724
Tuck and Rolls
KIMG0259.jpg
Make a flat bread, almost, but thicker.

Then you want your bread to rise. This time you do need to let it rise until doubled. While your bread rises, preheat your oven to 400 degrees.

KIMG0262.jpg
Those are perfect and ready to bake

Now it’s time to cook these. Put them in your 400 degree oven for about 10-12 minutes. Every oven is different.

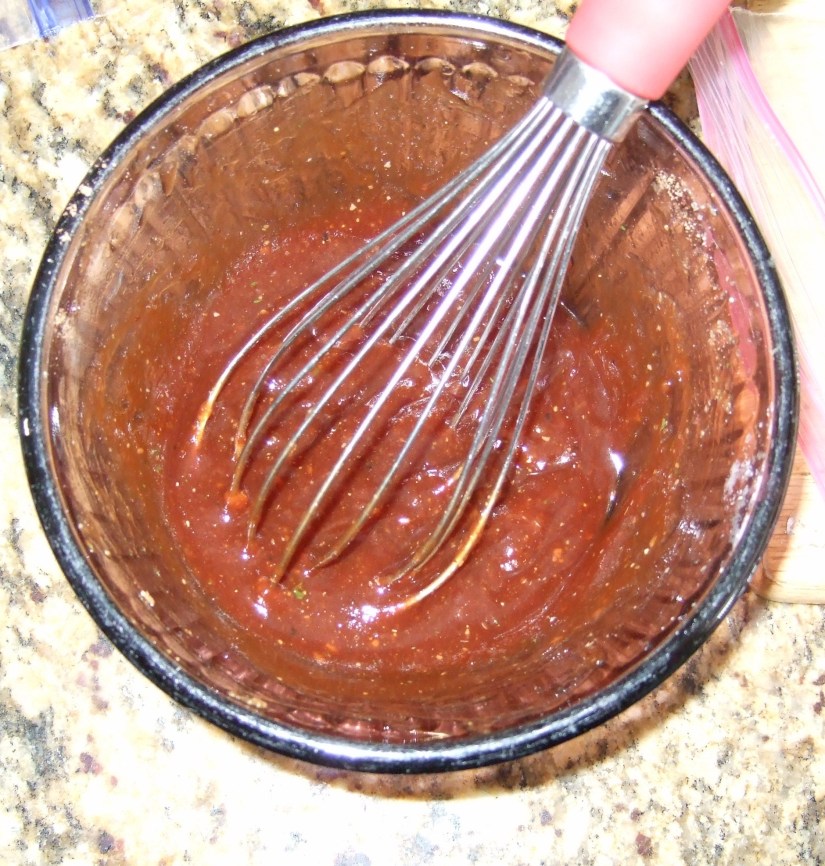
While your bread is cooking, you want to make the garlic oil for the top. I make this oil for everything. I use it on garlic bread sticks. It’s great on calzones too. Both are made with this bread recipe.  I make a container of the oil and leave it in my pantry. You don’t have to do that. You can just make it for one meal.  You can also do this with melted butter. It’s really good that way but olive oil is my favorite.

I like to buy bulk ingredients at Sam’s Club. They have the best prices that I have found on olive oil, bread and all purpose flour, and yeast. This Lawry’s has bits of garlic and herbs. It makes the best garlic bread, in my opinion. It is a tiny bit more expensive but worth the extra dollar or so.

KIMG0264.jpg
Healthy Olive Oil and Granulated Garlic Salt
KIMG0268.jpg
Look at all those bits of garlic and herbs.


You want to use a tablespoon of garlic salt to 1/4 cup of oil or butter. Mix them up and use a pastry brush to spread it on top of your hot baked bread.


So that’s it. The hardest part is waiting for this to cool so you can eat it. You do want it to cool so that it is not gummy.  It actually cooks a little while it is cooling. Breadsticks don’t make it long enough to cool but they are smaller and it’s not so bad.

KIMG0272.jpg
Nice way to make a sandwich


Tako No Mo
Recipes

Tako No Mo; Asian Chicken Tacos

Do you need some peace and quiet? I am finding that food is a good way to accomplish that. When everyone is hungry, food in the mouth has a calming affect. Especially these delicious tacos. No talky, no more.

I don’t know about you but I just love tacos. I love them so much that you all are going to get sick of my taco posts. I love them every way they are made. Seriously. I have never met a taco that I didn’t like.

We love any Mexican food. My first, and only, visit to Texas was when my son graduated from boot camp. We went to San Antonio, Texas. While there, we did two very memorable things, (aside from screaming my sons name from the bleachers and acting like a crazy parent); The Riverwalk and Market Square.  These tacos remind me a lot of how we ate at the Market Square. This market was filled with Mexican and Spanish influenced foods and shops. We, my husband and I, sat on a bench eating homemade foods; sausage and chalupas, homemade guacamole, salsa and chips, and of course ice cold Dos Equis beer. We watched an elderly lady dance for at least an hour. The band played and she danced. I wish I had that on film. Clearly, I was too busy stuffing my face full of the most delicious, homemade chalupas. Literally, we were eating street fare, singing, laughing and experiencing Mexico, right here in the USA.

There are so many great places to eat in America. We have so much diversity, when it comes to food. I just love learning how people eat from different countries. I can’t get enough of it.

Locally, we love to eat tacos at Barrio. Here is their website in case you live in Ohio and want to check them out: www.barrio-tacos.com

I don’t make any money for suggesting companies. I do it strictly to enhance my reader’s experiences.

Barrio is such a quaint place. Very trendy. But most importantly, Barrio has amazing tacos. They have a huge selection. They throw stuff on a taco that you would never think to eat and they do it with great success.

Now, I don’t have a fancy kitchen with tons of ingredients. I have come a long way though. There are things that I use now, that I would have never even looked at years ago. Mostly, out of necessity, I would pass things up that I thought to be exotic. I had children to feed. I couldn’t afford to buy this stuff. The thing is, deep down, I am an adventurous person. I love to try new foods, especially. I am not picky. If I see something that I want to try, then it will just scream at me until I do. There is nothing like sitting up at night and thinking about a food that I want to eat. I can’t be the only person that does this?

So what is my point here?

Frugal tip:  When I see a recipe, I don’t run out and buy a bunch of ingredients. I look at the recipe and I find things in my pantry instead.

That is exactly how I make these Tako No Mo, Asian Tacos.  The only ingredients that you must have are easily available. There are two things that I have in my house, that I would have just passed right up, when I was a younger cook.

Ginger and Chinese Five Spice

Seriously!! Where have these ingredients been all my life? I use them religiously now.  They are both spectacular. They make such an impact on flavor for so many meals. They are great in fried rice, egg rolls, wonton soup and these tacos. They both are great on any meat. I love to put it on grilled pineapple and mix it with grilled veggies and meat, then serve it over rice. They are both amazing in your ham glaze or pork rub. There are loads of health benefits to ginger. Ginger is known to improve immunity, sore throats, stuffy noses, etc.. So putting it in your soups when you are sick, could be a great way to naturally fight off the side affects.

I store my ginger in my freezer to keep it fresh. Frozen ginger grates easily as well.

Are we ready to make these?

For the chicken:

2 pounds boneless skinless chicken breast or thighs

2 cups BBQ Sauce (any kind)

Juice of one lime

2 teaspoons grated ginger (or 1 if you are not use to using ginger. It takes time to get use to the flavor)

2 teaspoons Chinese five spice

2 teaspoons garlic powder

2 teaspoons onion powder

2 teaspoons cumin

Sriracha to taste, or something with heat, like pepper flakes or cayenne (optional)


Mix all the ingredients with a whisk in a mixing bowl.

Sauce

Cut chicken in to cubes or leave whole depending on which cooking method you go with. Me, personally, I like to grill the chicken whole and then dice it after it’s cooked. It’s 3 degrees in Ohio right now, so I went with the oven method. Therefore I cut my chicken in chunks

Put the chicken and half of the sauce in a zip lock, or a covered bowl, and let it marinate for as long as you can. If you don’t have time to marinate, it’s not a big deal but you still want to mix half the sauce with the chicken. Set the other half aside until later.

When you are ready to cook the chicken, heat your oven to 375 degrees, or start your grill. A crock pot is ok too. I am not a big fan of over cooked chicken breast but the thighs hold up well in a crock pot.

Cover a cookie sheet with foil and spread the chunks around.  Or, throw your whole pieces on the grill. Now if you are grilling this, be careful because the sugars in the BBQ sauce burn easily. Or, of course, throw it in a crockpot.

DSCF0684

Cook the chicken until thermometer, placed in the middle of the chicken, reaches 160 degrees.

Asian BBQ Chicken
Look at all that flavorful juice


If you are cooking in the oven, or crockpot, you will have a bunch of juices. I drain the juices into a small saucepan and cook it down until reduced in half. This step is very important. The sauce is where so much flavor is. If you cook down the liquid, you get even more of a concentrated flavor. I do this anytime I am cooking something with a sauce on it.

The Sauce is boss
The sauce is boss.


Once the liquid is reduced, I add, to the reduction, my other half of the BBQ sauce. Again, very important part. You are basically incorporating all these levels of flavor into a store bought BBQ sauce. You are not spending a lot of time on the other ingredients, so make this part shine. You want to cook this mixture for at least 5 minutes. The stickier your sauce the better. The longer you cook it, the stickier it becomes. It is still delicious if you are in a hurry and can’t cook it for awhile. If you are using a crockpot, you should be doing this with anything that requires a sauce. This technique is great when you are making General Tso’s Chicken in a crockpot. This final technique takes it from great to spectacular.

Asian BBQ Sauce
Not quite sticky enough but getting there


Once reduced and sticky, pour it over top your cooked chicken pieces. Stir it in the chicken is done.


For the slaw: 

I cheated and bought this mix at Aldi:

asian slaw mix from Aldi
Life Saver


Feel free to use whatever dressing it comes with. I have tried the Asian sesame one and it was really tasty. Last time I shopped they didn’t have that flavor so I made my own dressing.

You can easily make your own mix with cabbage, carrots, green onion, etc. But for $2.29, this was worth it for me.

I put the chopped salad in a bowl and added about 1 tablespoon of soy sauce and white wine vinegar, along with about a teaspoon of Chinese five spice and ginger. Then I added a small amount of sour cream. A large dollop of sour cream from my big tablespoon. Feel free to experiment with different ingredients. I’ve used other ingredients like lime juice. I don’t always have lime juice. I try to substitute an acid for an acid; a sweet for a sweet, etc. I have omitted the sour cream too. Be adventurous!

DSCF0690


To assemble the tacos:

Using a very hot pan, you want to cook corn tortillas. You throw them in and wait until they start to bubble and steam. Then you flip the corn tortillas over and do the same on the other side. At this point, you have to really watch things. Things move quickly at this point. That is a good thing and a bad thing. Fast is good but fast means burn; and I mean you can really create a smoke-filled home in a minute. This is the part where you need to stay close to your stove.

Like eatig on the street
Time to flip

Once the tortillas are done, you simply top with a couple hunks of chicken, some slaw and something crunchy. The slaw mix had crunchy stuff with it. However, I like crunchy lo mien noodles for this recipe. Use what you have but at least try the lo mien noodles once.

lo mien
Not just for soup


Then, finally, the last thing that I love to use but it is not 100% necessary, is fresh cilantro. It adds a whole new level to these tacos. I grow it in my garden. When it’s not garden season, I buy it every time I go to the store because it’s my favorite. It’s $1.00 at our local grocer. I would suggest, if you can’t get your hands on it for a reasonable price, forget about it. For this recipe, I keep the cilantro in big pieces. Yum!

Tako No Mo
You will need a bigger plate for sure


For the picky eaters, they just ate tacos with chicken, the cheese from the mix and lo mien noodles. They ate several tacos though. That is just one more reason to love tacos. You can make them how you like them.

Enjoy!


Twice baked ranch potatoes
Recipes

A Side Dish for 6, Using 3 Potatoes

Today I made a steakhouse worthy dinner. I made T- bones, recipe here, with mushrooms and twice baked potatoes. I have added the recipe to cook the perfect steak, with a tutorial video and step by step instructions.  Sure we are eating a T-bone for dinner. Don’t let that fool you because we eat a lot of hamburger. We can afford to eat T-bone on occasion because we are careful how we eat everything else.

But right now, lets talk about those potatoes.

Basically, they are stuffed with whatever I can find to put in them, with three basic ingredients: potatoes, sour cream or plain yogurt, and cheese. Since they are whole potatoes that are cut in half and then stuffed, making one potato into 2 portions.

I like russet but you can use any potatoes you have. Yogurt is especially good in the small new potatoes.

I started by cooking my potatoes on my wood burner, because that’s how I do things. I am frugal. If my wood burner is heating my home why not let it serve dual purposes.  Obviously that is not a requirement for any of my recipes. I put them in a Dutch oven and cooked them until they were fork tender, (and apparently burnt).

Baked potato skins

Perfectionism is not my thing, as you can tell by these burnt bottoms. Sometimes I get really busy. I only burn things when I am blogging. Um yeah.

something is burning
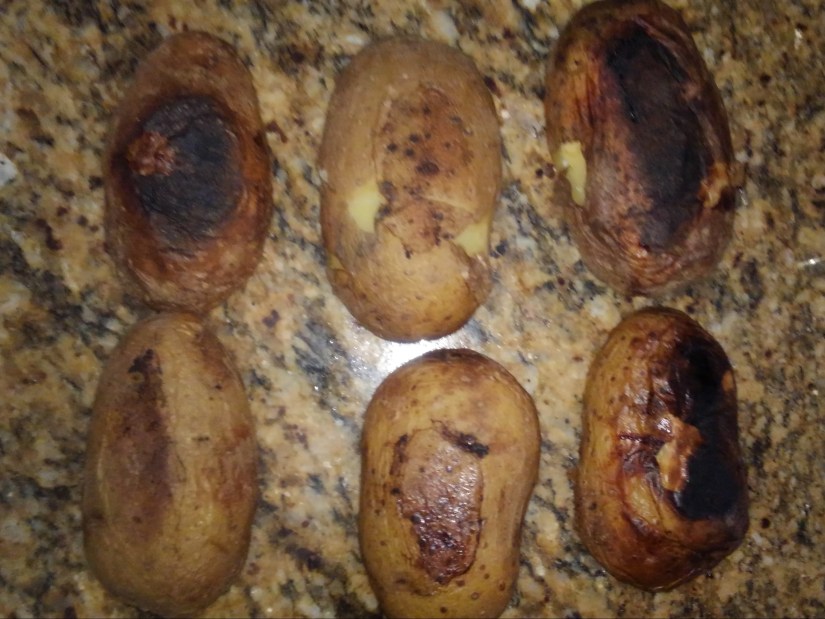
Until my mom passed, I didn’t really understand the impact of burnt food. I remember, as a child, all the times I burnt my toast and mom would say, “Give it to me, I love burnt toast.”  It occurred to me, one day over a plate of burnt toast, that my mom probably didn’t even like burnt toast. But that’s what we do, as moms. We eat burnt toast.

Anywho…

Cook your potatoes in the oven if you don’t have a handy-dandy dutch oven. Just put them on a cookie sheet and cook them until they are tender, about 40 minutes to an hour. The other advantage to smaller potatoes, less cooking time.

When they are done, cut them in half and scoop out the centers.

cut and scooped

Put the centers in a bowl and add the sour cream, or yogurt, and grated cheese.

Now lets talk about the cheese. I used hot pepper and gruyere. You can use any cheese your heart desires. I have never judged a person for the type of cheese they use. Velveeta or American slices; sometimes you make due.

We happen to have a good cheese assortment because we have a nearby cheese house that has extremely great prices. Their cheese is so good too. My family has been shopping there for many generations. I just love Yaggi’s Cheese House. They are located in Ohio, were I live. I can remember going there with my grandmother, Alice, as a kid. They give you cheese samples. They don’t charge an arm and leg for it either.  You know how some places charge you a fortune for cheese but give you free samples? Not at Yaggi’s. They still have old school coolers to grab a soda from. The same coolers they had 40 years ago, probably longer. That’s just what my memory can muster. The best part for my readers? You can have things shipped to you if it is the colder weather days.  They don’t like to ship during the hot months, as the cheeses can be damaged by the heat. So order a lot and freeze it. That is what I do.

I usually also add bacon but I didn’t have any. And since I made these with this yummy steak, recipe is here, I didn’t think anyone would miss the bacon. I added dry ranch and dill to my potatoes and they were really good.

If you want to fancy them up, here are my favorite add ins:

  • dry ranch
  • dried onions
  • chili
  • shrimp
  • green chilies
  • dill
  • thyme
  • oregano
  • rosemary
  • chili powder
  • garlic or onion powder
  • seasoning salt
  • taco seasoning
  • lemon or lime zest
  • bacon
  • jalapenos
  • sweet onions
  • diced red pepper
  • pepperoni
  • sausage
  • green onions
  • buffalo sauce
  • salt and pepper

Once I stuff my tators with my favorite stuff, I put them back into my dutch oven until all the cheese is melted, about 10 minutes. The lid makes them cook quicker. One advantage to cooking smaller potatoes is a shorter cooking time. If you make them in the oven it may take a little longer, but the potatoes will come out a little different.  It firms up and the top will crisp up more. I like them both ways but you may want to try them both ways and decide for yourself.

Of course, I forgot to take a picture when the potatoes were hot and bubbly, but I have a picture of them later, after dinner.

stuffed tator

I may, or may not, have been eating that tator for a midnight snack.


Recipes

My Favorite Banana Cake

I’ve been making banana bread for as long as I can remember.  It is such a versatile recipe. Bananas, by themselves, are inexpensive, naturally sweet and good for you too. This banana bread recipe is just a basic recipe for bread but I use it for everything. It’s super easy to make. In fact, today, I had help from a 5 year old. He made almost the whole batter with little help from me.

ulrich

And apparently he has the same disgust for what is known as Satan’s Anus, aka this nasty little black spot on the bananas:

ulrich hates it too

Today I made a cake out of this basic recipe. Not just any cake. A bunt cake.

So lets talk about bunt pans. Right here. Right now. I am confessing my addiction. The bunt pan is an obsession of mine. Don’t ask me where it began. I can only tell you how much fun I have had with them. I can only attempt to tell you why I love them so much. So here it goes….

First of all, I am not a cake decorator. If you need someone to teach you how to make those really pretty roses out of frosting, forget about me. It’s never going to happen. However, I can tell you that a bunt pan can transform the most basic cake recipe into a wow moment, with no extra effort than using a muffin pan. In fact, I believe it to be easier than a muffin tin. You only have to pour the batter into one pan and done.

Now why do I have so many bunt pans that I have to use them to decorate my kitchen, (clearly I need a bigger kitchen)? That’s a good question. For that, I  have no answers. Could you just have one bunt pan and still get the wow factor? Of course.

Maybe it’s because of all that fun I told you about.

Some of my favorite bunt pans were bought while shopping with people I admire and at places that I love. Thrift shops, estate sales, yard sales; If I see a bunt pan, I am not opposed to fighting someone for it. The pan I am using today is my favorite of them all. I bought it while visiting my parents in Mississippi. I found it for $7 at an overstock store. I will say that $7 is kind of pricey for me. I would normally haggle someone down to only a couple bucks. This time I caved. I caved hard. It’s treasure to me. Also, look at these chickens on here. Chickens are my other obsession. Ok I might have a lot of problems. I never claimed to be perfect. But look at this little lady:

chicken bunt

Can you see the hearts shooting from my eyes when I look at this?

You can almost see it! I know!


And look at how cute those chickens look on my cake:

simple and delicious cake

It’s a little hard to see with a camera, but trust me, they are adorable.

Look at who else is adorable:

ulrich all smiles

So my tips on using a bunt cake are short but very important. Use a good baker’s spray and use it generously. Don’t skimp on this one. You don’t have to use name brand but you will ruin your treasured pans if you use regular cooking spray. If you don’t have a baker’s spray, you can use good old fashioned oil and flour. You just generously wipe oil in every crevice, then sprinkle flour all over the oil so it sticks to the whole pan.

KIMG0239

I also like to top the cake off with a browned butter glaze. It’s really easy to make. You just cook a stick of butter until it turns golden brown. Watch it closely so it doesn’t burn. Then add 1/4 cup of brown sugar, or regular white sugar. Stir it in and mix it until the sugar dissolves. Then dump it on the cake, all over. Wow! What a great addition! You can also sprinkle powdered sugar on it. However, you may lose some of those cute little chickens under the sugar. It just depends on your pan. Plus that butter, on a fresh baked bread, is so amazing.

So for the recipe. This is my basic recipe for banana bread. I hope your family comes to love it and use it as I have. You can put literally anything in this. I have put every kind of fruit, nut, chip, toffee, etc, that I could think of. Frozen and canned fruit must be drained. I’ve used dried and fresh fruit with just as much success. I’ve stuffed it with cream cheese. I’ve topped it with many different glazes, like rum, brown butter, vanilla, etc. I’ve made it into muffins, cakes and breads.

Please share with me, how have you used your bananas when they look like this:

bananas

General

The Journey Begins

Thanks for joining me!

Anyone who knows me knows how much food, travel and family has impacted my life.  I love them all. However, raising children and managing life can put a damper on things. The journey was not always easy. Somehow we made it through. I learned a lot along the way. I am still learning and growing as a parent, each day. I am now a grandmother and enjoy spending time with my grand children, as well as my children.

Today, I am starting a new journey. I am going to spend my days doing what I love to do; write, create and share my experiences.  If you enjoy saving money and time on food, travel, gardening, child rearing, grandparenting, (yep I made that word up) and just every day life, then please join me on this journey.  I would love to take you along.

Good company in a journey makes the way seem shorter. — Izaak Walton

post