Recipes

8 quarts for $1

Over the holidays, turkey was on sale everywhere. I mean for $.67 per pound, who would ever pass up on deal like that? Me, Mrs. Frugality, would take full advantage of such a discount.

I am a person that saves money by weighing my options. When I grocery shop, I am looking for the bottom dollar, yes, but quality plays a factor as well.  I think we have all suffered from buyers remorse when you get something of very, poor quality. If you buy in bulk, like myself, you are really stuck with those remorseful feelings.

Poor quality speaks for itself, in my opinion. That is typically something that is trial and error; and, there is not much I can say to help you with those decisions. Just don’t buy in bulk if you are really concerned, and be concerned. Don’t just spend freely on something you have never tried. If you do err and buy something you don’t like, donate it or use it anyways. In the great words of Macklemore, “One man’s trash is another man’s come up.” There is someone out there that likes what you bought. Trust me. Or, like I said, suck it up and use it up. I don’t believe in wasting. That is a sin in my opinion.  After all, there are starving children in Africa.

To look for the bottom dollar is one of the best ways to save money. I am not a couponer. I really don’t have the time to use them. You have to shop at a lot of different stores. I don’t have that kind of will power. If I go to a store, I am unable to buy only the couponed items. I will overspend at every store I enter. I am infamous at saying, “Oh what a great deal.” and buying things that I really don’t need. Ok, so you get 10 tubes of toothpaste, or shampoo, that I don’t even use, for 1/2 the price. That’s still money that I am spending and on things that I don’t like. I am particular about certain items. I don’t use store bought shampoos or conditioners. I take very good care of my teeth and only use what my dentist told me to use. He has never steered me wrong. Having dry and cracked hair, or cavities and sensitive teeth, is not worth that kind of savings to me. In the end, you are going to pay from poor quality.  Now, if I have coupons for the items I know are good, then by all means I will use them.

I have learned, over the years, to buy things when they are on sale, and buy a lot. If you are saving a lot of money, then that is when you buy.  When I buy turkey I buy enough for almost a whole year. I have two refrigerators, and one large freezer.  We buy beef from a friend and we have our own hogs. My husband hunts for deer. We have a large garden too. We don’t always have our freezer stocked. We unplug it when it is not being used; however, there are times when I can’t fit another thing in all 3 freezers.  We have chickens for eggs only, and no turkeys, so we are limited to Amish, or store bought poultry. At first it is hard to buy in bulk because you are spending a lot of money on that one item. That is where you learn to live without for a bit. It is hard, I know, but worth the challenge. It’s ok to want for something. When you always have whatever you want, whenever you want it, you don’t appreciate it as much. We don’t eat a lot of fresh fruits and vegetables in the winter. We eat a lot of canned from my garden, or store bought. So when strawberries are in season, we eat our weight in strawberries. I also buy those strawberries and freeze, or can them, for the winter. They aren’t as good as when they are fresh but they are good. They are still great in smoothies, cakes, muffins, etc. Be creative. So, since you are not buying a bunch of strawberries in the winter, that is when you buy the other stuff, like ham and turkeys, that are on sale over the holidays. Buy in season and buy a lot. You are saving hundreds, maybe thousands, annually by doing that. If you want to be frugal, learn to go without and appreciate what is in season.

So what’s my point here?

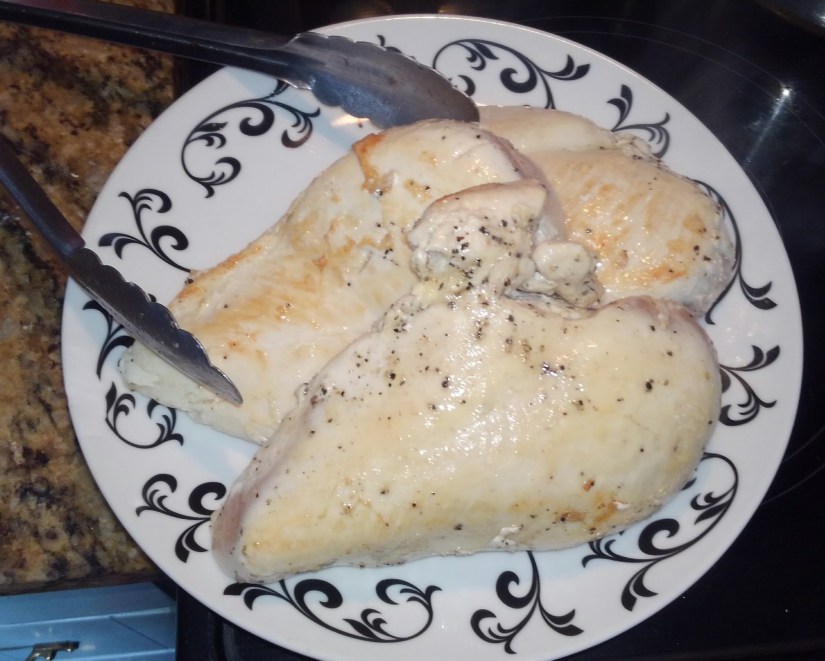
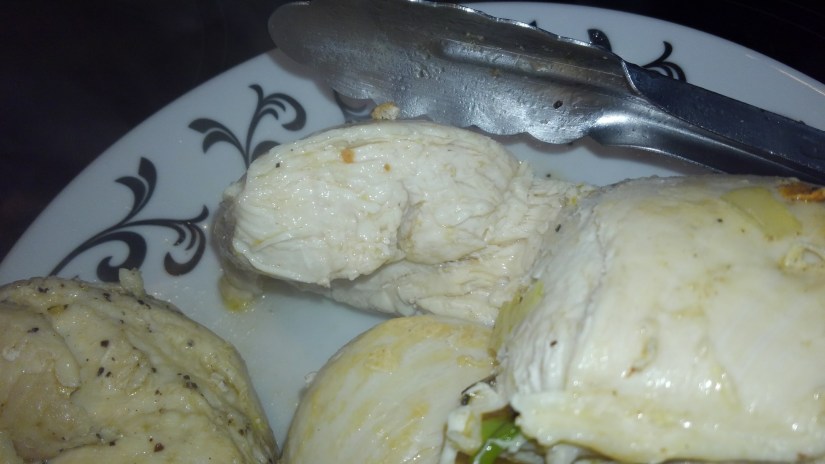
We have been eating turkey and not much other poultry. When I cook turkey it is really delicious. Next time I make one I will share my techniques. The breast is great for so many recipes. After my turkey thaws, I cut my turkeys up and use the white meat, mainly. We don’t like the dark meat as much. I usually cut those sections off and freeze them again. Yes. You heard me. Freeze it again. There is a horrible misconception that you can not refreeze uncooked meats. You certainly can and I have been doing so for as long as I can remember. The recommendation is that you only thaw your meat in the frig. Ok, so do that if you are concerned. I don’t keep refrozen meat in the freezer for long though. It does tend to get freezer burnt more easily because oxygen is the enemy. Make sure you wrap it very tightly and use it within 2 months, at the latest.

So, what to do with all these turkey parts? Make a stock. Lots of it.

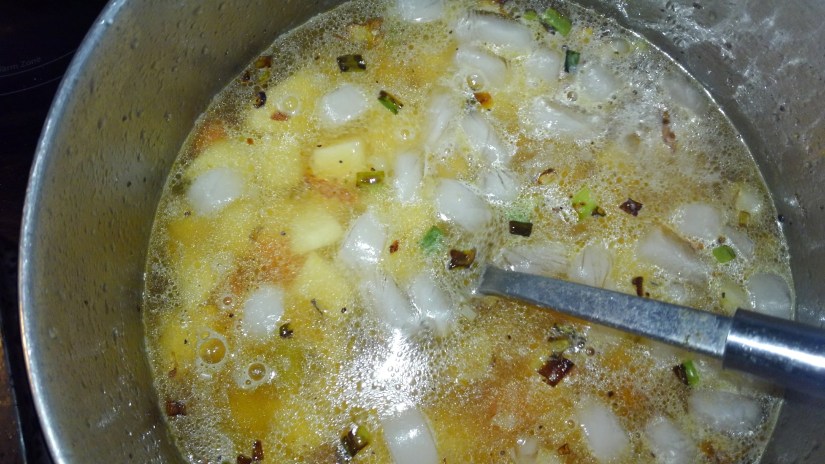
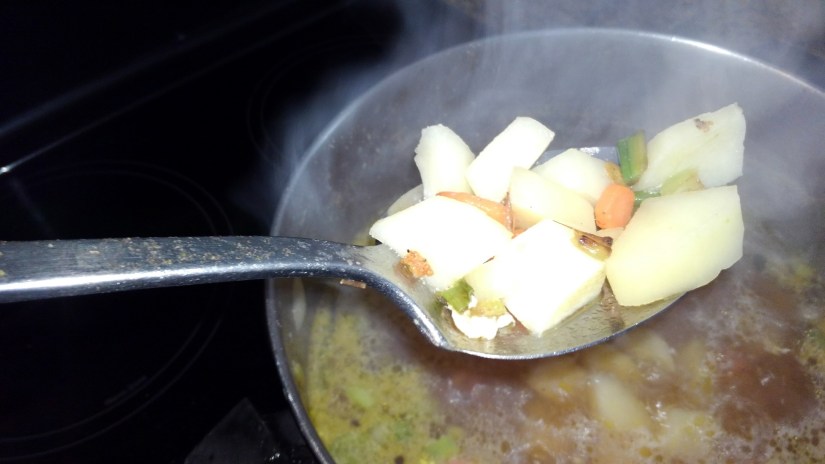
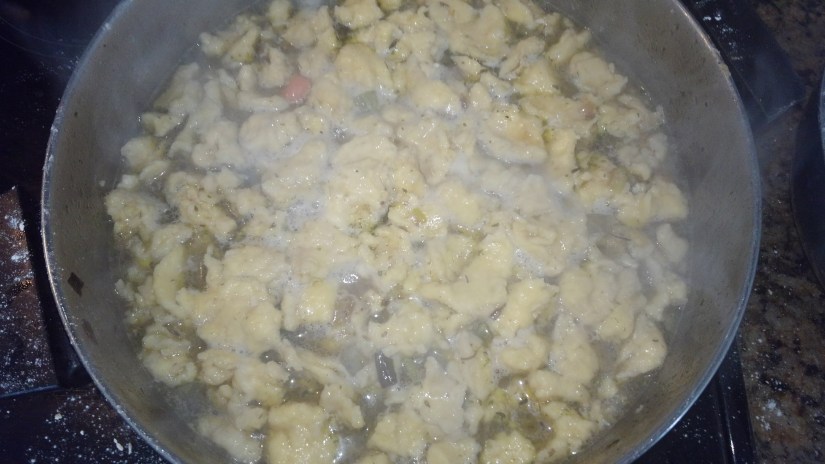
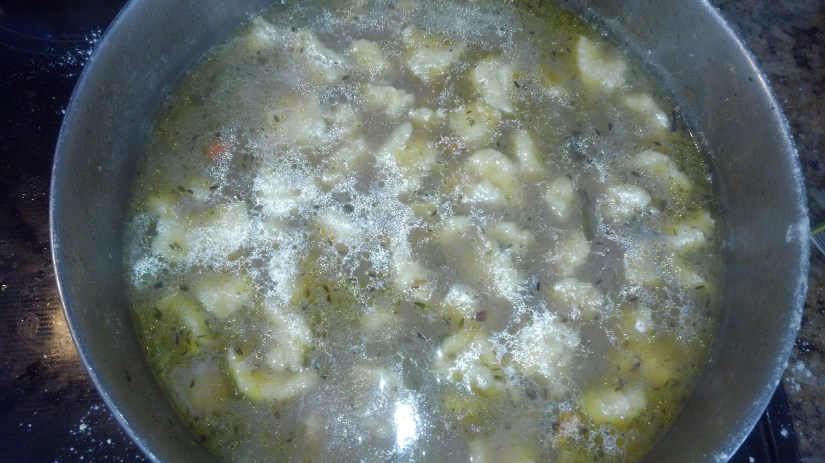
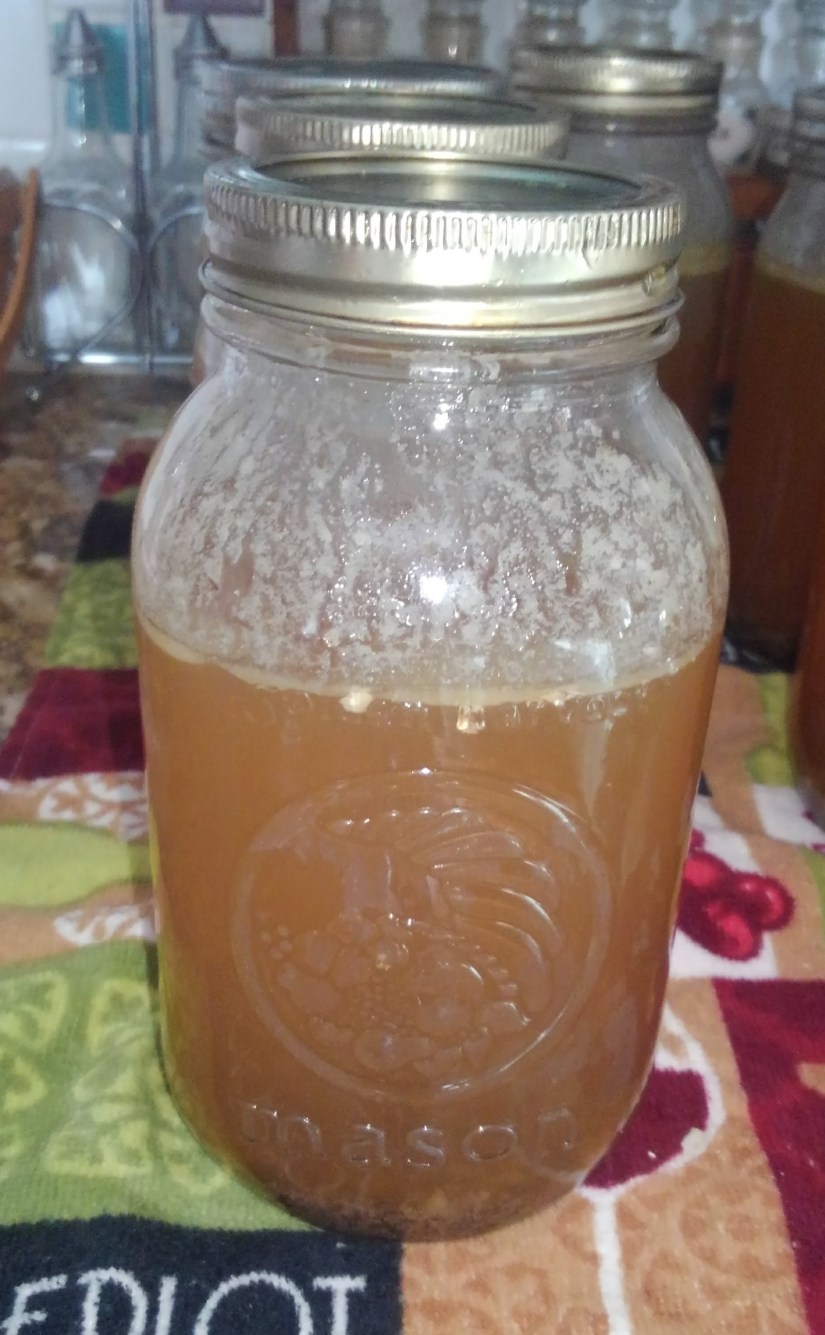
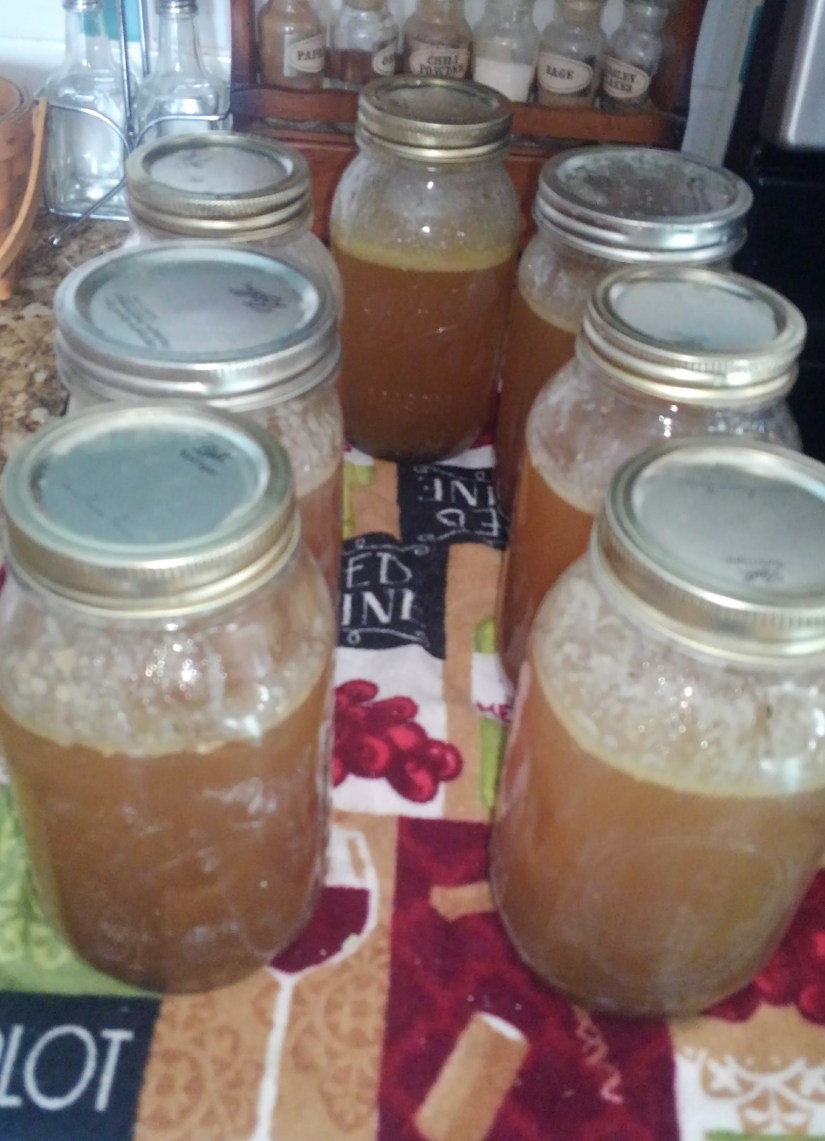
I made a huge pot of stock on my wood burner. It cooked for hours. It was super cheap to make. In fact, it made 8 quarts of rich, flavorful turkey stock. Turkey stock is usually around $5.00- $7.00 a quart. That’s crazy!! I made 8 quarts for about $1.00. Actually, on the day I cooked my stock I also made chicken and dumplings, so I got more like 12 quarts out of this pot. But I will stick with my conservative pricing and say 8 for $1.00.

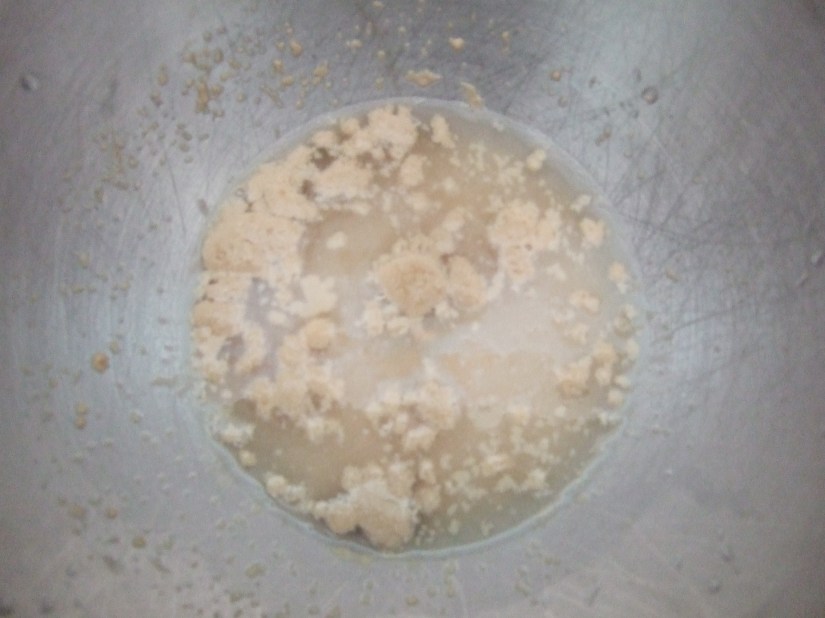
I added a couple carrots, onions, celery, garlic, dill, sage, tarragon, parsley, thyme, the meat, salt and pepper. In the summer, when I have more available varieties, I would add parsnips and kale. Make what you have. Don’t run to the store and buy a bunch of ingredients. If you don’t have onions and garlic, dried is fine. If you don’t have the herbs, don’t include them. You can include whatever you like to whatever you are cooking, when you actually use the stock. Sometimes I do that on purpose so that I can add those flavors later. I don’t always want all those flavors in my food.

Now, there are two ways you can store your stock after you cook it.  You can put it in containers with lids, (I use to use recycled sour cream and yogurt containers) or Ziploc baggies. The other is to can it in a pressure canner. That is the way I did it.

KIMG0376.jpg
Look at the color. That is rich and flavorful. What a treat to add to your favorite soups and gravies.


My pressure canner is invaluable. I spent $60.00 on it. Today, when I made 8 quarts of stock, I saved, on the low end of the estimate, $45.00. Just one day of stock saved me over half of what I paid for my canner.

Canning can be scary but once you do it for the first time, you start wondering why the heck you waited so long to use one. They are so simple, especially the ones in the stores these days. They simplified the process by removing the old-school gauges and replacing it with an automatic weight and gauge. I mean seriously it was so easy.

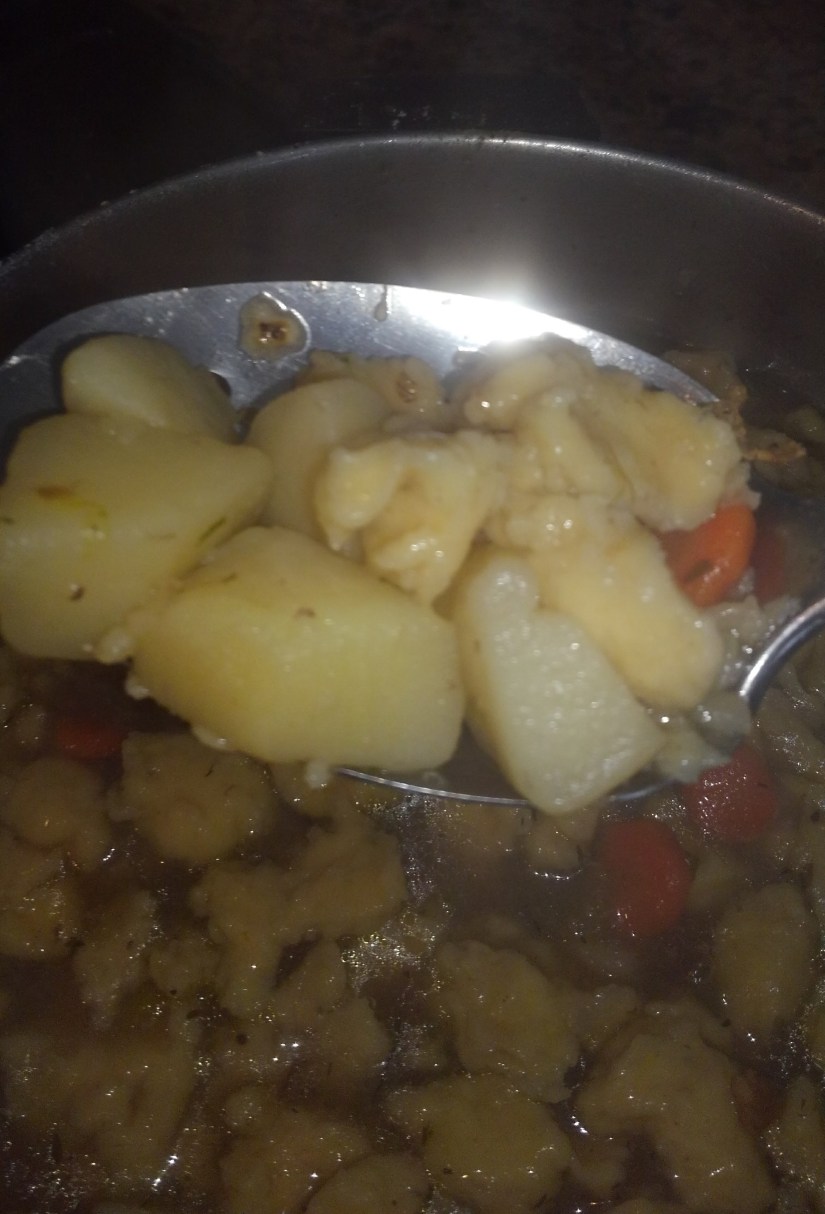
Once the stock has cooked, and the meat is falling off the bones, I ladle the liquids into the jars. I drain the meat into a bowl and add the last bit of liquid to my jars. Then I follow the instructions for canning meat that comes with your canner. Those are very easy step-by-step instructions. Be sure to follow them religiously. You will save yourself a lot of trouble that way.

KIMG0375.jpg

When I first started canning it took me some time to understand how things work under pressure. The biggest mistake I made was adding too much, or not enough water. Even if you do these things, the finished product is still edible. It just looks funny because the water is so low. It doesn’t hurt anything. You do have to add more liquids when you actually cook the meal. It defeats the purpose of having a soup in a jar if you have to do more cooking when you are ready to eat it. There are things that you can not can, like dairy products, rice and noodles. Those are things that I add to my meal after we crack the jar open for dinner. No big deal and no one dies from botulism.

So what did I do with all the goodies that flavored my broth, the meat and veggies? I added rice and made 16 cups of dog food with it. If it were anything but turkey, I would feed it to my chickens. But I have a serious problem with feeding poultry to my poultry. I know many people do and no judgement here. It’s just not something I do. My neighbors have two dogs and they get all the rewards. I pick out the bones and smash every thing up. I cook rice in my microwave and add it to the other ingredients. I also cooked, separately, the turkey guts. I don’t care for the flavor they add to my broth but the animals love them. I just put them in with the rice when I microware the rice. You put the lid on the rice and cook it until it is tender.

KIMG0377.jpg
This is why my neighbor dogs love me.


If you really want to be frugal, start freezing all the scraps from cooking, like the carrots, celery, pepper and onion ends, or carcasses and meat pieces from chickens, turkeys and hams. Wash the veggies and add them to the freezer. Pull them out and throw them in the pot, just the way they are. The animals will love you for cooking those for them, instead of throwing them in the garbage.

I know this sounds like a lot of work, but incorporate help from your family. Saving money is good for everyone. Think of what you can do with the hundreds of dollars you save. Don’t just think of it, show it. When you take the kids to the movies, or bowling, tell them, “Thank you for helping me be a frugal mom by helping around the house, and kitchen. With the money we saved, we can now do these fun family things together.” Or use the extra money to donate to your favorite organization. Save the money for a trip to Disney.

What a great lesson to carry through life. Teaching your family, and yourself, can be discouraging at first but don’t shriek from a challenge. Overcome and reap the rewards.

Recipes

Healing with Chicken and Dumplings

So you’ve heard it all before. The best chicken and dumplings. So why am I boldly claiming that I am making the best chicken and dumplings?

Let me show you.

Cooking certain foods can be a labor of love. How many times have I either said, or heard, “it was made with love.” Well, love means “your efforts”. This recipe is not a quick meal. It can be, if you prepare the day before by making the stock. However, there are still techniques that change your soup from being really good, to having people, many people, (I am not bragging but maybe a little bragging to get my point across) tell you that they have never had a better bowl of chicken and dumplings. Now that, my friends, is like music to my soul.

I tend to be a giving person. I love to do nice things for others. It just warms my heart. Cooking is my passion, where I get to create and challenge myself.  I create food and give it away. It brings me much joy. If someone is sick, or just had surgery, chicken and dumplings. Death in the family, chicken and dumplings. Today I am cooking for friends at church that just had a baby. What a blessing! Babies are exciting, especially when you are not the one that has to change diapers, get up all night long, and the many other sacrifices associated with being a parent. Today we celebrate because it’s fun to celebrate, in my opinion. It’s always fun to celebrate.

There are a few things that I have learned about the perfect soup.

  1. You must develop the flavors of the meat and vegetables
  2. You must not over cook the meat until it is a million shreds, or dry and hard to chew.
  3. Never cook your potatoes in hot water. Potatoes have to start with cold water to keep them in the intended chunks.
  4. Don’t add the milk or cream until the very end. It will burn and give you all sorts of troubles.

First thing is first. You want to develop the flavors of the chicken. I do this by searing the chicken in the pan first. I do not add any herbs at this time, only salt and pepper. The herbs tend to burn when you are searing meat.


Searing is easy. You get the pan very hot, add your oil, then put the meat in and let it cook until it is golden brown. Then you flip it. Searing is so important when you cook meat. It creates a very juicy finish. Meat that melts in your mouth. It also puts that carmel flavor in the bottom of your pan like here in my picture. That is where so much flavor comes from.

KIMG0333.jpg

Once they the chicken is seared, they are done for now. They will not be cooked through but that is just fine. We are going to finish cooking them later.  Their only job, for the time being, is to give the flavor to the pan, and by searing, you are locking in the juices, to create very, tender chunks of meat. I take the chicken out and place it onto my soup plate.

KIMG0334.jpg
My soup plate holds everything, including the chicken or vegetables that I need to let set out. It saves my counter from the caked on mess that cooking for a long time produces. I use it to store my spoons, ladles and tongs, while I am cooking with them.


Next, you want to take full advantage of those pan drippings to develop the flavors in your vegetables. I diced celery, carrots and onions then threw them in the same grease from the seared chicken. Then I sauté them until they are also golden brown. That releases the sugars and then caramelizes the sugars for a more intense flavor.


Now you are ready to make the perfect potato. Have you ever cooked something with potatoes just to have them turn to mush? That is because you are starting them in warm, or hot, water. I have learned to treat my potatoes very delicately. It only takes a little bit of effort to do so, and the reward is really amazing hunks of potatoes, or mashed potatoes that are not water logged.

I deglaze my pan by adding cold chicken stock, or today I had turkey stock. I also add ice cubes to ensure my water is good and cold. The pan was just searing and blazing hot, so ice cubes are very effective. Then I throw those cubed potatoes into the iced broth.
KIMG0338.jpg

At this point you want to make sure your broth is very flavorful. Potatoes really use up a lot of salt and flavor. If you do not season them well, you will be doomed to never having enough salt and flavoring. So, taste your broth now, or when it starts to heat up again, to ensure it has plenty of salt and pepper. I also have a few ingredients I will never leave out: Dill and Tarragon.  I love sage and chives in my dumplings too. But I feel that it is not the same without dill and tarragon. I grow and dry my own but these are inexpensive herbs to find in the dollar section of your grocery. Sometimes tarragon is harder to find. Tarragon has a really hardy flavor so go easy on it at first. Just a pinch. It compliments creamy soups and completely worth trying.

Also, make sure you scrape the tidbits off the bottom of the pan after the liquids have been added

Now put the chicken back into the pan and boil every thing until the chicken can be easily cut with a spoon, or fork.  That’s also how I knew it was cooked through. Once it is, you remove it again and place it on your plate.

KIMG0343.jpg
The chicken cut like butter with my tongs.
KIMG0341.jpg
Tators are still in whole pieces.

Now we are ready for the dumplings.

Here is how I make them.

I use 1 tablespoon of milk for each egg. Today I used 4 eggs and that made the perfect amount of dumplings for my pan. I add salt and pepper and whisk the end and milk with my big giant fork. Again, make sure these are seasoned well. Like the potatoes, the dumplings will soak up the flavors from your broth, so make sure everything is very flavorful.


The secret to delicious egg dumplings is to make them tender and flavorful. I shared the flavor tricks but how do you get them to be tender? Patience.

I used 4 cups of flour and about another cup on my hands to keep the dumplings from sticking to my fingers. You are still going to have sticky fingers but it helps to have very floured hands.

You want to add the flour a 1/2 cup at a time. This helps keep them tender by not having too much flour. I add it and do not mix them up completely. You don’t want to develop the glutens in the flour, so slow and easy.

KIMG0346.jpg
See the chunks. This is what you want, not mixed completely, just enough to bring it together some.


Keep adding flour and mixing lightly until you can pick it up with well floured hands. It’ll be slightly wet still.

KIMG0351.jpg
Rip off pieces and flatten them a little with your thumb.

Get your broth with the veggies boiling and throw the ripped pieces into the pan.

The dumplings will float to the top of the broth. But they are not done yet. Gently stir to make sure they don’t stick. You want to wait until the dumplings start sinking and mixing with the other vegetables. That is when you know they are done. You will have a nice thick broth with tender egg dumplings.

KIMG0352.jpg
Start


kimg0357.jpg
Finished


While you are waiting for the dumplings to sink, about 20 minutes, cut the cooled chicken. When the dumplings are sinking, add the diced chicken back to the pan.

KIMG0353.jpg


Now it’s time to add the final touches. To really make your chicken and dumplings creamy, you want to add cream and corn starch, also known as a slurry. To do this without lumps, you need to temper the slurry with your broth.

First, add  1 cup of cream, or half and half, and a 1/4 cup of cornstarch to a cup. Whisk with a fork. Then, to the slurry, add a couple ladles of the hot dumpling broth.


Stir  the slurry into the dumplings and cook for another 10 or 15 minutes, watching closely to prevent burning on the bottom. It will burn easily at this point.

I served this with delicious homemade breadsticks.  Follow the link to use my quick bread recipe and alter it by cutting dough into breadsticks, and bake them in a 400 degree oven for about 12-15 minutes, until browned. All other steps are the same but these.


I learned a couple things today. A) It’s really hard to take a picture of something that is steaming; and, B) you should never run an add for your business and also decide to make homemade chicken and dumplings. But even though this took me all day to complete, blog and all, look at how these potatoes still look like potatoes. And the chicken is still tender, meaty and very hearty.


Try this recipe for yourself, on a cold day, when you are locked in for the day, and encourage your children to help you with it. You won’t be disappointed.

Recipes

Salisbury Steak in Disguise

Comfort food. What is our obsession?  I don’t know about you but any meal that is served with mashed tators and gravy is what I live for, especially in the winter.

When I was a young mom, before I knew better, I would buy frozen Salisbury steak.  My kids would devour it. Now that I know better, I realize how amazing homemade Salisbury steak is.

To me, this is southern, comfort food that us northern folks have admired for so long, they are now a staple in every home. I learned to make Salisbury steak from a southern cook. Of course, like all recipes I come in contact with, I have to alter it to make it more affordable and healthful.

In my family, we have a mix of picky eaters and eaters that will try anything you give them. The obviously easier to feed, being the ones that will eat and try anything, (like their momma). So how did I incorporate more vegetables into the diets of my picky eaters? I disguised them as comfort food. Oh yes, this meal has plenty of meat, mashed tators and gravy; but, that gravy has tons of veggies in it.

In the south, they use a browning ingredient called Kitchen Bouquet. Basically it has vegetables in it. It’s a rich ingredient with loads of flavors. So what I have done? I make my own version of it with fresh vegetables.

I got the idea years ago when I learned to make my own spaghetti sauces. I use the same techniques to make all my sauces. If I can grind up my veggies so they are unrecognizable, then you get all the benefits of their flavor and nutritional value, without the whining, crying, begging and pleading. I do that for anything that I want to eat with a sauce.  It adds so many health benefits, yes. But the best part, all the flavor it adds is going to blow away even the pickiest eater. In fact, when a rich stock is made, the veggies and the meat bones are where those deep flavors are created. I mimicked those same flavors, without cooking stock.

Here is my recipe:

For the patties:

2 pounds ground beef.

1 diced pepper (I used frozen ones from my garden and it had a mix of peppers in it, including green peppers)

1 tablespoon each of garlic powder, minced onion, black pepper, salt

1 teaspoon each of thyme, tarragon (optional)

2 tablespoons of beef broth (to keep the patties tender)

1 cup of flour

1/2 cup oil

In a bowl, add the meat, peppers, seasonings and beef broth. Form the mixture into patties and roll them in flour. Brown the patties in the oil on both sides.

My picky eaters are no longer at home so I left my peppers in the large frozen chunks. If you need to, mince them or put them in your food processor and make a paste.

I cooked my patties on my wood burner, in my dutch oven. That is not necessary. That is just how I cook in the winter. I like to use the heat that is already there, versus heating my oven. If you are using your oven, you want to preheat your oven to 350 degrees. You also want to use an iron skillet or heavy pan.

After frying the patties, remove from the pan and set aside.

For the Gravy:

1 large carrot

1 large celery stalk

1 large onion

4 cups of beef broth

1 packet brown gravy mix

2 teaspoons each of thyme, tarragon, salt, pepper, garlic powder

As I stated earlier, I use vegetables to make my gravy.  For it to taste like a true gravy you have to mince, very tiny pieces, of your veggies.

I love my slap chopper. I would seriously invest in one because they are handy as can be.  You can use a food processor, if you don’t have a slap chopper. The food processor will really pulverize your veggies, making a paste out of them. No matter your method, you will get the same results. I leave my onions whole but feel free to disguise those as well.

After your veggies are minced, you want to throw it in the hot pan, with the same oils, that you browned the patties in.

Brown the veggies until they are golden in color. Once it is golden, that is the point where all the sugars have been released and then browned. That creates so much flavor for your gravy.


After you have achieved the proper golden yumminess, you want to deglaze the pan with the beef broth. I used water with bouillon. I am a firm believer in using what I have on hand. You could even use onion soup mix, or canned French onion soup. They are all equally delicious. You will need about four cups of whatever you use.

Add the seasoning, the brown gravy and whisk. Then add the patties back to the pan. Cover the pan. Cook the patties in the gravy for at least an hour, for very tender patties.

KIMG0321.jpg
Those veggies will cook down and make the best sauce you have ever tasted.


This video was taken after about 1/2 an hour had passed.


After about an hour you will have this yummy meal. Keep checking the patties and when they are easily cut with a fork, they are done.

KIMG0324.jpg

My family devoured it and went back for more before bedtime.

KIMG0326.jpg
The little veggies can be seen but they are not obvious. More important is the taste.


Recipes

Pancake Demonstration

It’s the weekend on the homestead and my little guy is home from school. I just love the weekends. It’s our family time and we always try to have fun.

KIMG0288.jpg
Sled Riding in Style

One of our favorite things to do is make breakfast and spend the morning unwinding.

One thing that brings me joy is that all of my children have my love for cooking, including my little guy. In fact, today he made some pancakes for me.

KIMG0279.jpg
What a cutie

We could make completely homemade, from scratch, pancakes but we don’t. I have found the best pancake mix in the world. I buy this mix at GFS for around $6.00 and it’s worth every penny. Don’t let the huge box fool you. This mix will go fast, especially if you teach your children to make their own pancakes. These are crazy fluffy and slightly sweet. They make your house smell like you are baking a cake. Your family is going to fall in love with these pancakes just like mine have.

KIMG0276.jpg
Best Pancakes Ever


So my little guy had fun making these pancakes. I got a hot, delicious breakfast that I did not have to cook.  Now you know why we love the weekends so much.

He’s schooling me on the proper way to make pancakes.


In my opinion, frugality is a family affair. If you want to find ways to save money, and live with the freedom that homesteading offers, you must all work together. Quite frankly, I don’t think you need to live on a homestead to incorporate teamwork with your family.  If your children love cooking, let them cook. The sooner you teach them to take care of themselves, the easier the big-bad world is going to be for them. Let them cook and you do the dishes.  Trade a chore for a chore and make your day easier.

KIMG0287.jpg

Just a couple of tips. Don’t over mix your batter. I do this part for him, for now, to show him how it’s done. Also, make sure your heat is medium high. Not too hot to burn but hot enough that the batter sizzles when it hits the pan. It’s easier to flip and cook smaller pancakes. So keep them small and cook only one at a time at first. My final tip, wait until the bubbles form until you flip your pancakes. The more the pancakes are messed with, while cooking in the pan, the less fluffy the pancakes will be.

Next time you are tired and need a break, put them little chefs to work. You will get more than you ever bargained for.


Recipes

Garlic Bread Sandwiches

Today, like most days, was a busy one here on the homestead. We have basketball practice right after work. So it’s run around and run around some more.

Making dinner can be a challenge on those busy days. Eating out is expensive and unhealthy. Not that this menu, I am sharing today, is super healthy. However, it’s home cooked and I know everything that is in it.

One go-to recipe is my easy bread recipe. I use it to make breadsticks, garlic bread, pepperoni bread, buns, baguettes, rolls, flat bread, pizza dough and calzones. It is that versatile.

Not only can it be used for many dishes, but also, you can make it quickly and with no special equipment. If you can make a boxed cake, you can make this recipe.

Today I used leftover meatloaf to make quick sandwiches out of my bread recipe. I am a big fan of making extra meat and freezing the leftovers to use in another meal. I try to recreate something so leftovers are not boring. I rarely buy bread at the store, by the way. Why when my homemade bread is great? I love to make sandwiches, yes, but these are special sandwiches because they are made with garlic bread. I make bread, cover it in yummy garlic olive oil, slice it down the middle and fill it with my favorite items.

Garlic Bread Meatloaf Sandwich

If you think this sandwich looks good, you should try it with Italian meats, cheeses and peppers. It makes a superb deli sandwich. Especially with the garlic seasoning on top.

There are a few things to remember with bread. You don’t want get your water too hot or you will kill your yeast. There are many rules with bread but my recipe doesn’t apply to the rules because it’s what I consider a quick bread. You are not developing a bunch of flavors like sourdough, or a chewy outside. This recipe is as basic as Chef Boyardee.

This recipe is easy to double too. It makes two small or one large loaf. Homemade bread does not have a long shelf life since it does not have all those preservatives that store bought bread has. So darn, you will need to eat it up right away. If you do have leftovers, store it in your fridge.

So lets get started.

For the dough:

1/4 cup of warm water. It should be warm but not hot.

3 tablespoons of sugar

1 packet of active dry yeast

Put all three ingredients in a bowl and let set until the yeast is bubbly. You don’t want to skip this part because this is where you find out if your yeast is good. Bubbly is good. No bubbles, then your bread will not rise properly.

DSCF0718

The other ingredients:

3/4 cup of warm milk

2 1/2  to 3 cups of all purpose or bread flour

2 tablespoons of oil. I prefer olive oil

1 teaspoon of salt

Add the milk, oil and salt, to the yeast mixture. Gradually add the flour. Start with 2 cups and add the rest a little at a time. You want your dough to be sticky but not unmanageable. I use my mixer with a dough hook but it is not necessary. This dough does not have to be perfect but it’s better if you don’t have too much flour. If you do, it will make the dough more dry, versus soft and tender. Otherwise, if you don’t have a dough hook, you just mix it with a fork and use your hands to kneed it for a minute to make sure all the ingredients are mixed well. Again, you are not going for any special features. Just a good quick bread.

This video demonstrates what your dough should look like when it is done with a mixer. This is the perfect consistency. It sticks to the bottom but not the sides of the pan. When it looks like this, you are done with adding flour.


From this point there are multiple things you can do. I recommend letting the dough rest for at least 10 minutes. That way it softens up and it’s easier to work with. You can also let it double in size, like most recipes, but it’s really not necessary. The more you let it rise and break it back down, the more the yeast flavor develops. If you are in a hurry, it doesn’t need it. Also, there is a lot of sugar in this bread, which allows the bread to rise rather quickly. Yeast eats sugar and that is what helps it do it’s thing.

DSCF0721
I let it rise until doubled because I had time

Now it is time to shape your dough. I made large squares out of mine. Almost like baguette bread but more square. I needed my meatloaf to fit perfectly on the bread.  To shape the dough in a bread, you want to flatten it and roll it jelly roll style. You tuck the ends and roll.

DSCF0722
Flatten it out first
DSCF0724
Tuck and Rolls
KIMG0259.jpg
Make a flat bread, almost, but thicker.

Then you want your bread to rise. This time you do need to let it rise until doubled. While your bread rises, preheat your oven to 400 degrees.

KIMG0262.jpg
Those are perfect and ready to bake

Now it’s time to cook these. Put them in your 400 degree oven for about 10-12 minutes. Every oven is different.

While your bread is cooking, you want to make the garlic oil for the top. I make this oil for everything. I use it on garlic bread sticks. It’s great on calzones too. Both are made with this bread recipe.  I make a container of the oil and leave it in my pantry. You don’t have to do that. You can just make it for one meal.  You can also do this with melted butter. It’s really good that way but olive oil is my favorite.

I like to buy bulk ingredients at Sam’s Club. They have the best prices that I have found on olive oil, bread and all purpose flour, and yeast. This Lawry’s has bits of garlic and herbs. It makes the best garlic bread, in my opinion. It is a tiny bit more expensive but worth the extra dollar or so.

KIMG0264.jpg
Healthy Olive Oil and Granulated Garlic Salt
KIMG0268.jpg
Look at all those bits of garlic and herbs.


You want to use a tablespoon of garlic salt to 1/4 cup of oil or butter. Mix them up and use a pastry brush to spread it on top of your hot baked bread.


So that’s it. The hardest part is waiting for this to cool so you can eat it. You do want it to cool so that it is not gummy.  It actually cooks a little while it is cooling. Breadsticks don’t make it long enough to cool but they are smaller and it’s not so bad.

KIMG0272.jpg
Nice way to make a sandwich